Our Living Room
This post has been a LONG time coming! I’ve said before that our home projects usually span over lengthy periods of time…I wasn’t kidding! We first started on our living room in February 2018 – so over two years ago! We started out with the built-ins, and that took quite a while from drawing up the design to the actual build and installation. They were installed in May 2018, and shortly after that, we bought all new furniture, then we added can lighting and switched out the fan. In 2019, when we went through the kitchen renovation, we had the living room painted and that is also when I added the window treatments. Now it is finally “finished”…but really, is any home ever really “finished”? Ha! Thankfully I thought to take “before” photos back when we first started plans to change up the space, and I am so glad I did so you can see how big of an impact all of the changes made! Here are the drastic before & afters, as well as some detail shots…I’ve tried to link everything, and included other sources where available, but feel free to message me with any specific questions!
PS – You can check out our Kitchen here, and our Foyer here!
Before:

After:

If you have kept up with our home projects for a while, you know that I have worked with a local craftsman on pretty much all of our custom woodwork – Daniel Peoples from Tyson Creek Studio in Greenville, NC. I had a vision of what I wanted with our built-ins, and he executed on that vision perfectly! I knew I wanted white built-ins with a shiplap back, and reclaimed wood shelves, with plenty of cabinet space for storage, as well as shelves for our cable box/entertainment system. It’s amazing how much they transformed the space!
Quick note about paint – the built-ins are painted White Dove by Sherwin Williams, and I chose that color because I had intended on painting my kitchen cabinets, walls and trim that color. When the time came to start on the kitchen, we tested White Dove for our cabinets, and it was way too creamy, so we went with Pure White instead. SO, everything else in this space is Pure White (walls, trim, mantle, kitchen cabinets), and only the built-ins are White Dove. If I had known, I would have painted the built-ins Pure White as well, although no one would probably even notice the difference if you didn’t know to look for it. The “right” white ultimately just depends on the lighting in your room – I would definitely recommend sampling a few different whites and seeing how they look in the room with natural light, at different points throughout the day. You will be surprised how different the whites can look!
Before:

After:

One thing you need to know about me – I LOVE light fixtures. To me, they can make or break a space. One awesome light fixture can change an entire room. That being said, sometimes ceiling fans are a non-negotiable, especially when you live in the Carolinas and have unreal heat and humidity in the summer months. My husband was adamant that he wanted to keep a ceiling fan in this room, but honestly, they can be such an eye sore! I have been super pleased with the one that we chose. It is a much more modern design, and I feel like it compliments the room nicely, especially with the brass hardware. The thing I have been most shocked about is how much air it puts off! It is a powerful fan…we have been so impressed that I actually just purchased another one for our bedroom. I’ve linked ours below, as well as a few other similar/low-profile options.
You’ll also notice that we did a gallery wall over on that far right wall. I chose these super affordable frames (the 11×14 frames that hold an 8×10 photo) and have been very satisfied with them!

Before:

After:

One other detail that you’ll notice in this photo is the “X” on the end of the built-ins. It’s little custom details like this that I love! Also, this faux fiddle leaf fig is amazing and you won’t believe the price (hint: it’s from Wal-mart!)! This is the basket that I set it in.
Before:

After:

As you can see we also changed our furniture. I had been wanting a sectional for quite a while, and I have not regretted that decision one bit! The corner of the sectional is my favorite nook and is where you will find me 99% of the time! We also went with two matching chairs that recline, swivel and glide…Richard is totally a recliner guy, and he is picky, so it took us a while to land on a decision. We were leaning toward leather chairs, but I’m so glad we ended up with the navy upholstery. We worked with Whitley’s Furniture Gallery in Zebulon to pick our bases, and then our fabric, and had it all custom made. The sectional and chairs are both from the Smith’s Brothers line. If you are local and in the market for furniture, I highly recommend Whitley’s. Their showroom is HUGE and quite overwhelming, but you are sure to find something you love!
Before:

After:

Before:

After:

I have gone back and forth for the past couple of years about whether or not to tear out this mantle and redesign it, or take out the gas logs entirely and replace them with French doors that open up to our porch. FOR NOW 😉 , we are keeping it as is, but I decided to at least give it a minor facelift. We had the mantle painted to match the walls and trim (Pure White by Sherwin Williams). I then decided to paint the surround myself so it would not stand out so much against all of the white. It was a creamy beige marble tile before (as you can see in the before photo). I found a simple tutorial on Pinterest and used that as a guide. All it took was first sanding the marble a little to roughen it up, and then I added two coats of paint that was leftover from the walls and trim. I was pleasantly surprised by how much better it looked with just a few subtle changes!

We also changed out the mirror over the mantle and I am pretty much obsessed! It also matched the drapery hardware perfectly, and I didn’t even plan it that way! The drapery hardware is from Ballard Designs – I bought these rods (in the 1.25″ diameter) and these finials . The drapery fabric is from Caitlin Wilson Designs, as is all of my pillow covers. The exact pattern of these drapes is linked below. The candlesticks on the mantle are from Magnolia Home – I can’t find my exact ones, but these are very similar. I layered the wood welcome beads around the candle sticks – you can usually find them at Hobby Lobby, and you can find them on Etsy here. The vases on the other end of the mantle were a local find from the Carolina Pottery.

Styling bookshelves can be a challenge! I started collecting items to style these bookshelves months before they were finished. I incorporated some items from travels, other things that are more sentimental (like a drawing of our sweet Maggie, and a framed painting of our wedding invitation that was given to us as a wedding gift), lots of pretty Coffee table books, decorative objects, and pictures.


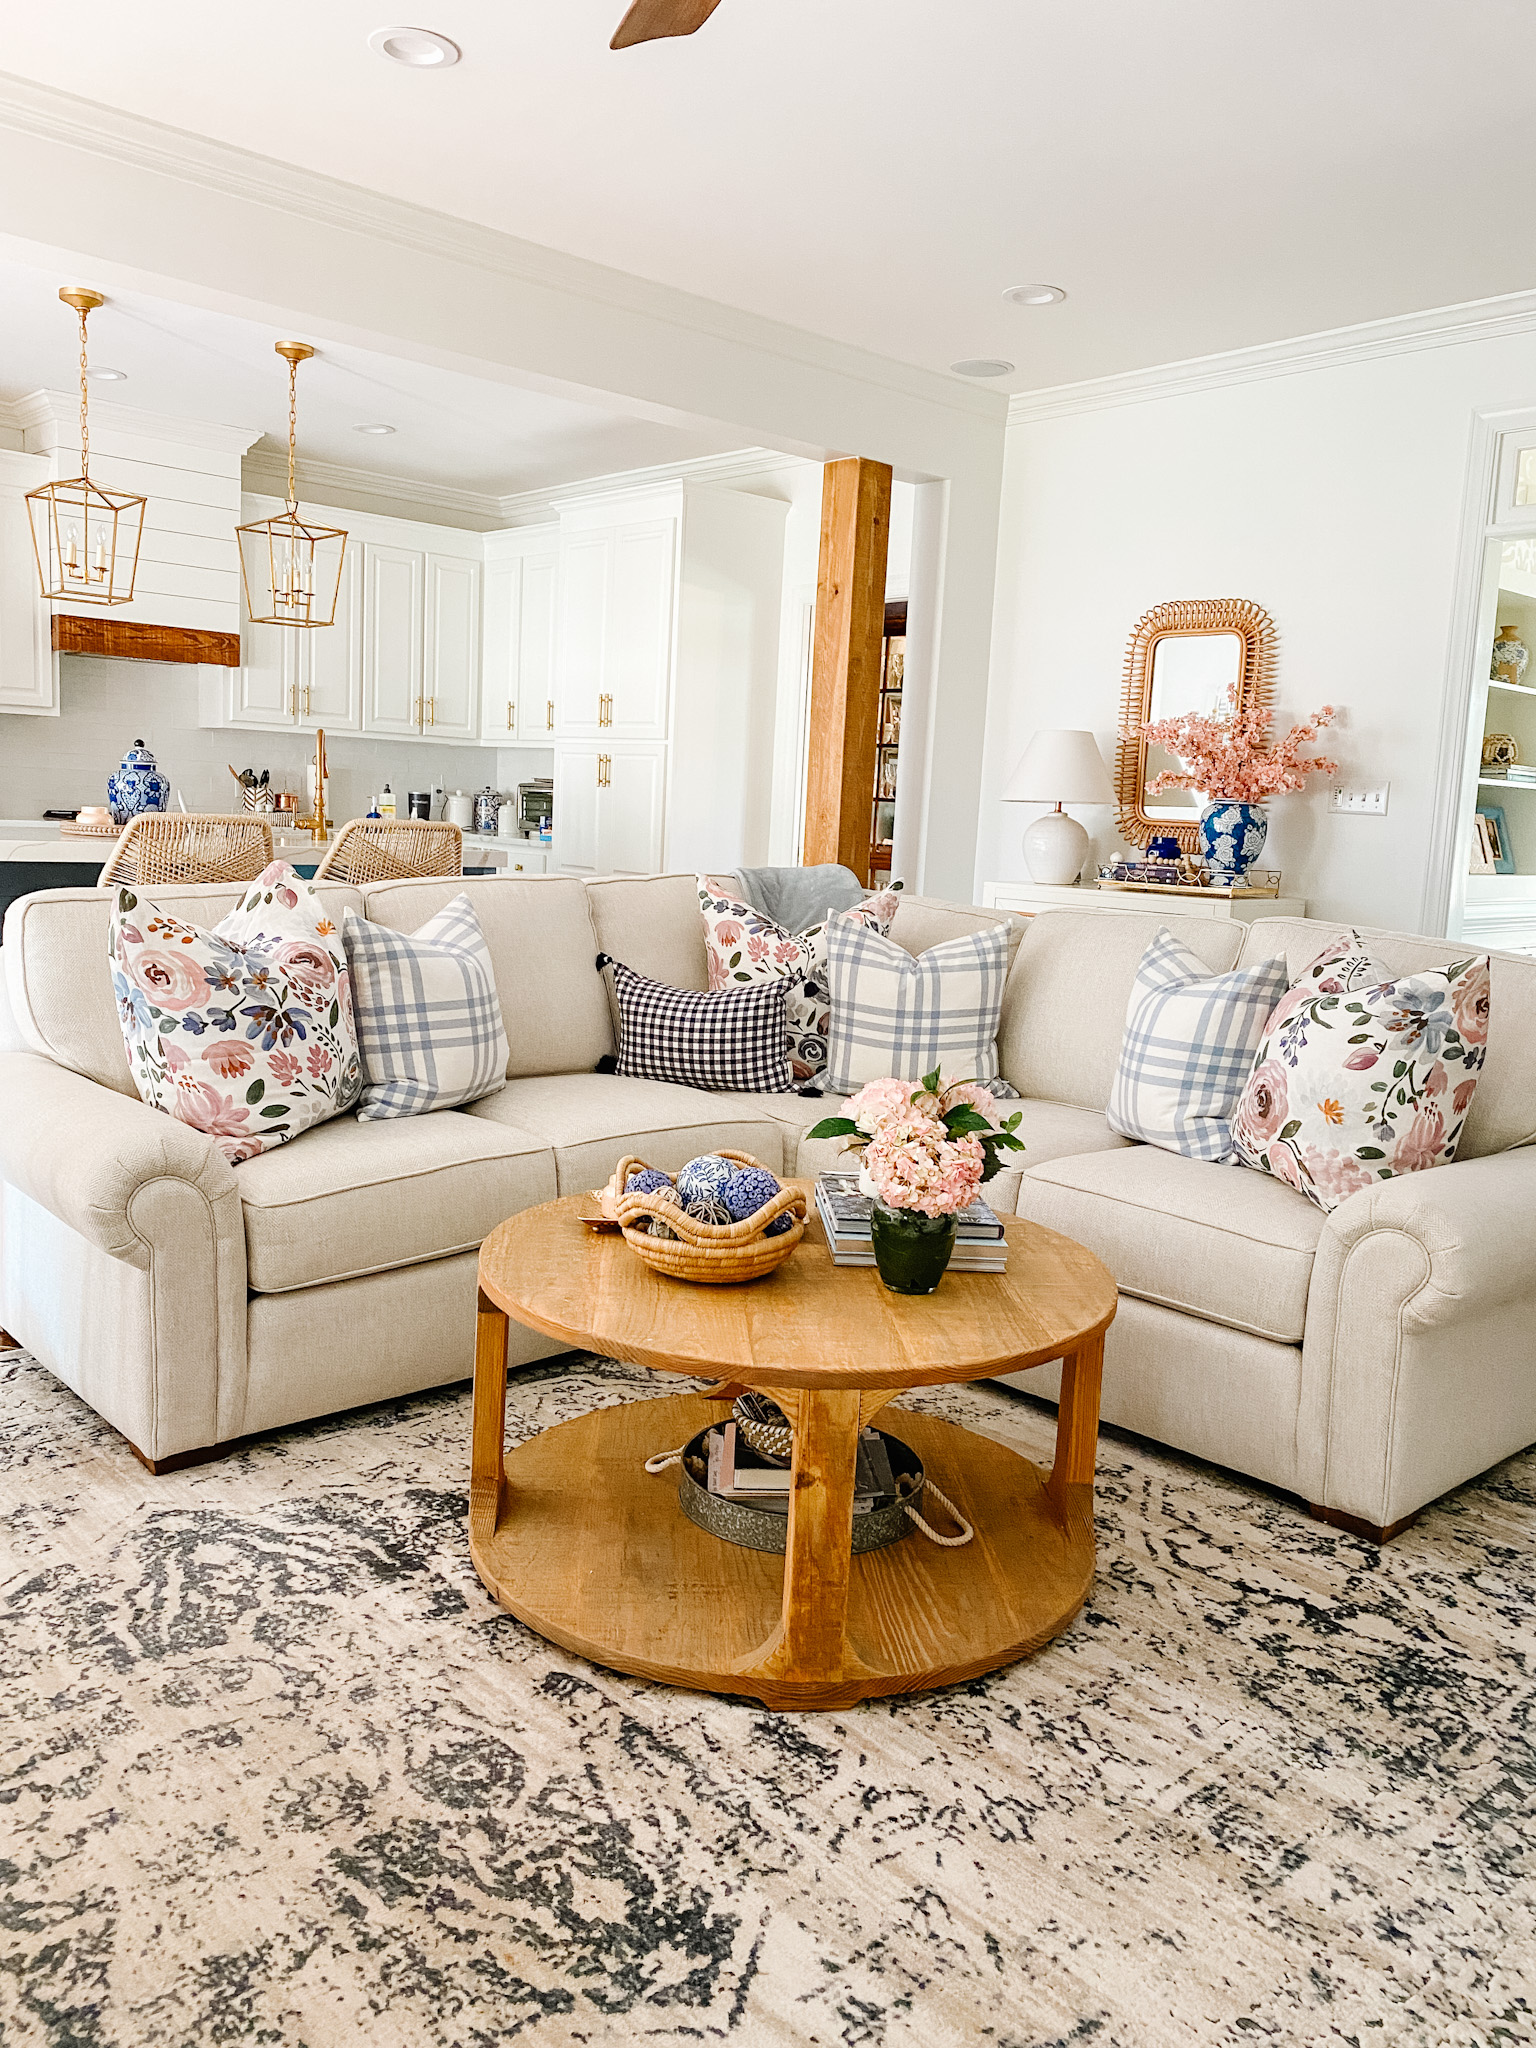
Seeing the view into the kitchen from the living room (and vice versa) makes me so happy! I love the cohesiveness of the color palete and how light and bright everything is now. And I particularly love the natural wood features throughout both rooms, like the shelves in the built-ins, the wood columns, and the coffee table – it is not an overwhelming amount of wood, just enough to warm up the spaces.

This is the rug we went with for the room and I have been very happy with it. The color scheme is perfect – it’s a navy-grey and silvery white combo, and you seriously cannot be the price for the size (we got the 9×12). We also put a rug pad underneath that I had cut from a local carpet store.
The coffee table was another struggle! I knew I wanted a round table to contrast with the angles of the sectional. There was a round table at Studio McGee that I was lusting over, but the color just wasn’t right and the dimensions were a little too big. Daniel to the rescue – when you can’t find what you are looking for on retail, have it custom made! Seriously, this guy is the bomb! He has worked on so many projects in our home at this point, and I have loved every single one.

I am forever moving things around and changing up the decor on the coffee table. This is another place where I like to keep pretty books, a candle or two, a tray to hold the remotes, and I always like to keep fresh flowers here when possible. The basket was handmade and purchased from a local shop in the Abaco Islands when we visited the Bahamas last summer, and I filled it with wicker ball fillers and blue & white ceramic spheres. I love being able to find special, one of a kind pieces during our travels that I can include in our home decor!

This little chest and decor was another space that took me a while to get just right. I love these cane front doors and the small wood trim details. I found this rattan mirror on Wayfair and it compliments the chest perfectly. The ginger jar was purchased at a local store, and I filled it with these beautiful cherry blossom stems from Amazon. The blue and pink coordinates well with the fabrics in the room. The gold tray was a super lucky Hobby Lobby find, and I use it to house the vase and some of my favorite coffee table books.

So there is our living room! It’s so fun to look at before & after photos! It is always so gratifying to see a space come to life. I hope you were able to gain some inspo for your own home…and don’t hesitate to reach out with any questions. Thanks for reading!


Comments (1)
DIY Fireplace Makeover – Pop of Pippi
May 19, 2020 at 7:01 pm
[…] mentioned in my living room makeover post that I made a few minor updates to our fireplace, but I wanted to write a quick post specifically […]
Comments are closed.