Decking the Halls
Hello friends! Have y’all started decorating for Christmas yet? I started decorating the weekend before Thanksgiving, and I am glad I did! Decorating is a lot of work, so I like to have it done early so that I can enjoy it as long as possible before it’s time to take it all down again! Today I am excited to share our living room all decked out for the holidays! I’ll also talk you through the details on each area of the space and some of my decorating tips!
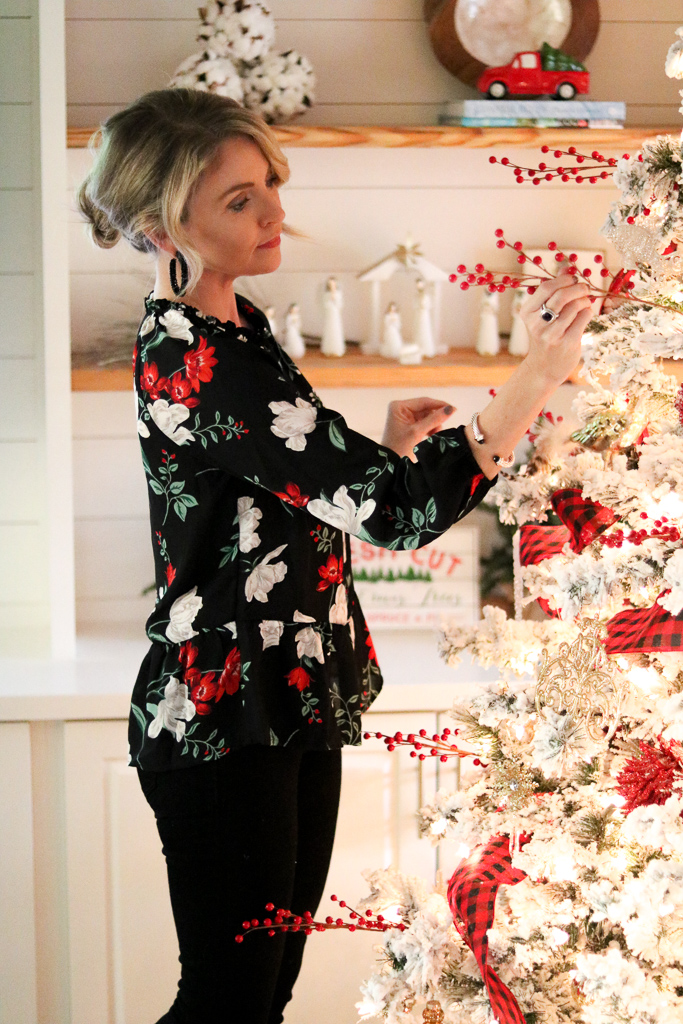
Up first is the main event – THE CHRISTMAS TREE! I bought this pre-lit flocked tree from Wayfair two years ago (this is our third Christmas using it) and I could not be happier with it. This one is the exact same brand as our tree, except ours has 900 lights (the only one I could find online had 750). I was a little nervous about ordering a tree online, but Wayfair shipped it super quickly and it was in perfect condition when it arrived. The only con is that it does make a big mess, but it’s no different than dealing with needles from a live tree.


When I decorate the tree, I first start with the topper. For this tree, I used several red berry stems, pinecone stems, a few antler stems, and some snow covered twigs. I bought all of these from the Carolina Pottery a couple of years ago. Next I added in the ribbon. I bought this red and black buffalo plaid ribbon from Hobby Lobby this year, and just weaved it into the tree at random. This was my first year doing it this way, and it took me a while to get used to working with it! After the ribbon, I added small red berry picks (which you’ll see in my hand in the above picture) randomly throughout the tree. I found these at Hobby Lobby a couple of years ago, and I buy a handful of them every year now. They’re inexpensive (maybe $1.99 each) and I use them so many ways around the house during the Christmas season, as you’ll see in these pictures! Last but not least, I added ornaments to the tree. In lieu of using a tree skirt, I bought this woven basket tree collar this year from Hobby Lobby and love the look! Here is the finished product…

Next up is the mantle. I showed a few “behind the scenes” of this on my story as I was decorating, so hopefully you saw more details there. I keep these canisters on the mantle year-round and just change out the greenery with the seasons. For Christmas, I always fill them with cotton stems and greenery stems that have red berries. I found all of this at Hobby Lobby a couple years ago, but they tend to have the same types of stems/greenery every year at Christmas.
I had been looking for pre-lit flocked garland for the mantle but was having a hard time finding any I liked that was not ridiculously expensive. I finally took matters into my own hands and bought a 9ft strand of flocked garland from Wal-Mart for $13, then a $2 box of 100 white lights and strung them on the garland myself. It only took a few minutes and I was able to achieve the look I wanted for roughly $15! Then I added red berries to the garland which really pop against the white flocking.
I bought the family new stockings this year for Christmas because the ones we have had for the past few years really didn’t work with our decor anymore. These are the exact ones that I bought, and I found the wooden letters in the dollar spot at Target for $1! They’re really ornaments, but they work perfectly on the stockings and are a much less expensive option than monogramming them! Also, funny story about the “P” – the ONE letter that my Target did not have was an “S” for my stocking…my stepdaughter checked the Target in her town and all they had was a “P”, so we went with that for “Pippi”! But not to worry, I had a friend check another store and she found me an “S” that should be on it’s way to me soon! 🙂


This is our first Christmas with our new built-ins, so it was fun decorating them for Christmas for the first time. Almost all of the decor I used here are items I already had from past Christmases, so that worked out well! As you will see in the picture below, I added greenery and my favorite red berry picks around the JOY letters to make them stand out a little more on the white shelf. These letters came from Hobby Lobby, as did the birch pillar candleholders. The wooden “Merry Christmas” sign is the only new thing and it came from the Target dollar spot!


For the other side of the built-ins, I filled the bottom shelf with mini Christmas trees and a little wooden sign that I have collected from the Target dollar spot over the past couple of years – I’m telling you, the dollar spot is where it’s at! I knew I wanted to use one of the shelves to display this precious nativity scene that I bought last year – it’s still available this year, too! Here is the exact one. I added some wintery snow-covered twigs around it just to fill in the gaps and give a little added texture.


For the coffee table, I filled a little metal bucket with green pine stems and red berries. The bells were another Hobby Lobby find from last year, and I decided to just lay them on the table. Last but not least is the white tray which has a mirrored gold snowflake in the center that you can’t really see in this picture – this tray was a Target find from several years ago. I usually keep a Christmas-y scented candle in the tray and a picture frame.


All of the pillows on the couch are old and came from Target and Marshall’s, with the exception of the cute little goat, which I found via an Instagram shop! The plaid throw blanket is a new addition and is still available!


I hope you enjoyed the tour of our living room Christmas décor! You can shop my outfit as well as the décor that is still available via the scrolling bar below. Thank you for reading!


Comments (1)
Sequins & Sparkles – Pop of Pippi
December 6, 2018 at 9:20 pm
[…] going?? Are you all ready for Christmas? The house is decorated (as you hopefully saw in my last blog post!), but I still have quite a ways to go with the Christmas shopping – I gotta get busy! […]
Comments are closed.